
Wood finishing can completely transform dull lumber into surfaces that look and feel luxurious. People are often surprised to learn that proper sanding alone can improve final finish quality by more than 60 percent. And while most assume it’s all about the stain or glossy topcoat, the truth is that getting a flawless look in 2025 starts way before the brush ever touches your project.
Table of Contents
- Essential Wood Finishing Techniques Explained
- Choosing The Right Finish For Your Project
- Step-By-Step Wood Finishing Guide For Beginners
- Maintenance And Touch-Up Tips For Lasting Results
Quick Summary
| Takeaway | Explanation |
|---|---|
| Proper surface preparation is essential | Thorough sanding and cleaning ensure the finish adheres well and leads to a high-quality result. |
| Choose the right finish type for your project | Consider wood type and intended use to select finishes that enhance durability and aesthetic appeal. |
| Apply multiple thin coats of finish | Thin coats dry evenly and provide better protection; apply 2-3 coats for optimal results. |
| Regular maintenance prolongs wood finish life | Develop a cleaning routine and address minor damages promptly to keep surfaces looking pristine. |
| Pay attention to environmental factors | Control humidity, avoid direct sunlight, and manage temperature to prevent damage to wood finishes. |
Essential Wood Finishing Techniques Explained
Wood finishing transforms raw lumber into stunning, protected surfaces that enhance both functionality and aesthetic appeal. Understanding the core wood finishing techniques empowers craftspeople and homeowners to achieve professional-grade results that preserve and beautify wooden surfaces.
Surface Preparation: The Critical First Step
Before applying any finish, proper surface preparation determines the final quality and durability of your wood project. According to the USDA Forest Service research, surface preparation involves multiple crucial steps that directly impact finish performance.
Begin by thoroughly sanding the wood surface using progressively finer grit sandpaper. Start with coarse 80-grit sandpaper to remove major imperfections, then transition to 120-grit, and finally 220-grit for a smooth foundation. Always sand in the direction of the wood grain to prevent unsightly scratches and ensure optimal finish absorption.
Remove all dust and debris using a tack cloth or compressed air. Any remaining particles can create bumpy or uneven finish surfaces. Professional woodworkers recommend cleaning the surface with mineral spirits to eliminate any residual oils or contaminants that might prevent proper finish adhesion.
Understanding Finish Types and Applications
Modern wood finishing offers diverse techniques tailored to different aesthetic and protective requirements. Film-forming finishes like polyurethane create a hard protective layer on wood surfaces, while penetrating finishes absorb into the wood grain, enhancing natural characteristics.
Polyurethane finishes work exceptionally well for high-traffic surfaces like floors, tables, and kitchen countertops. Water-based polyurethane dries faster and has lower volatile organic compounds (VOCs), making it an environmentally friendly choice. Oil-based polyurethane provides deeper wood grain enhancement and typically offers more durability.
Penetrating oils such as tung oil and linseed oil deeply saturate wood fibers, creating a rich, natural appearance. These finishes are ideal for cutting boards, wooden utensils, and decorative pieces where a soft, matte finish is desired.
Professional Application Techniques
Successful wood finishing requires precision and patience. Use high-quality natural bristle brushes for oil-based finishes and synthetic brushes for water-based products. Apply thin, even coats using smooth, consistent strokes in the direction of the wood grain.
Between finish coats, lightly sand with fine-grit sandpaper (320-400 grit) to create a smooth surface and promote better adhesion. Wipe away sanding dust thoroughly before applying subsequent layers. Most professional finishes require 2-3 coats for optimal protection and appearance.
Temperature and humidity significantly impact finish performance. Work in a well-ventilated area with temperatures between 65-75 degrees Fahrenheit and moderate humidity. Extreme conditions can cause finish cloudiness, slow drying times, or improper curing.
By mastering these essential wood finishing techniques, you can transform ordinary wooden surfaces into extraordinary, long-lasting masterpieces that showcase the natural beauty of wood while providing robust protection against daily wear and environmental challenges.
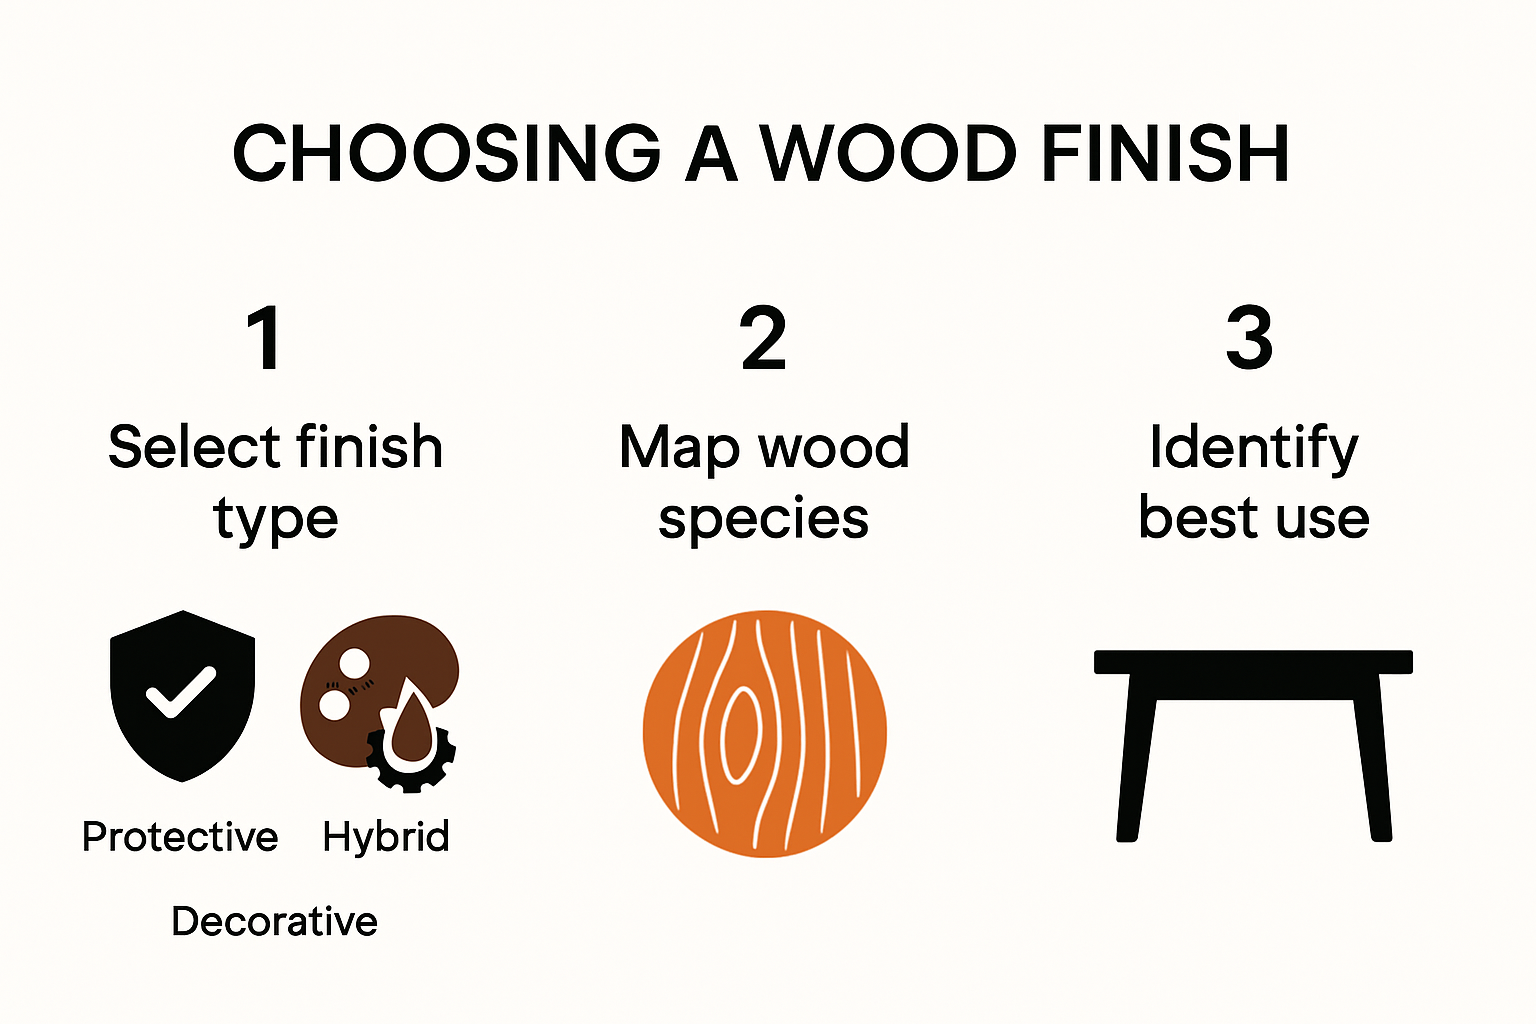
Choosing the Right Finish for Your Project
Selecting the appropriate wood finish is a critical decision that impacts both the aesthetic appeal and long-term durability of your wooden surfaces. According to the U.S. Forest Service Wood Handbook, choosing the right finish involves carefully considering multiple factors beyond simple appearance.
Environmental Considerations and Performance Expectations
Each wood finishing project demands a unique approach based on its specific environment and intended use. Purdue University’s Extension Service highlights that different finishes perform dramatically differently under various conditions. For indoor furniture, you might prioritize aesthetic qualities, while outdoor projects require more robust protection against moisture, UV radiation, and temperature fluctuations.
Wood finishes broadly fall into three primary categories: protective, decorative, and hybrid solutions. Protective finishes focus on shielding wood from environmental damage, while decorative finishes enhance natural wood grain and color. Hybrid finishes combine both protective and aesthetic elements, offering comprehensive wood surface management.
Match Finish to Wood Type and Application
Different wood species absorb and interact with finishes uniquely. Hardwoods like oak and maple typically require different finishing strategies compared to softer woods like pine. Consider the wood’s natural characteristics, porosity, and grain pattern when selecting your finish.
For high-traffic areas such as floors and kitchen countertops, choose durable finishes like polyurethane or epoxy. These create a hard, protective layer that resists scratches and daily wear. For decorative pieces or furniture with less intensive use, penetrating oils like tung or linseed oil can provide a beautiful, natural-looking finish that enhances wood grain.
To help you choose the best finish for your specific project, the following table compares the main types of wood finishes discussed in the article in terms of their advantages, best uses, and maintenance:
| Finish Type | Advantages | Best For | Maintenance Level |
|---|---|---|---|
| Polyurethane | Durable, strong protection, versatile | Floors, tables, kitchen countertops | Low (clean with wood cleaner) |
| Water-Based Polyurethane | Fast drying, low VOCs, eco-friendly | Indoor furniture, areas needing quick turnaround | Low |
| Oil-Based Polyurethane | Deep grain enhancement, durable | High-traffic surfaces, rich wood tones | Low |
| Tung/Linseed Oil | Enhances natural look, easy to apply | Cutting boards, utensils, decorative pieces | Moderate (may need reapplication) |
| Wax | Creates soft sheen, easy touch-ups | Furniture, light-use decorative items | Higher (regular buffing/waxing) |
| Epoxy | Ultra-hard, high protection | High-traffic/hard use, tabletops | Low (rare full reapplication) |
Professional Selection Strategies
The BBC Bitesize guide on surface finishes recommends considering finish transparency and sheen when making your selection. Options range from completely opaque paints that cover wood grain to translucent stains that allow natural wood characteristics to shine through. Finishes come in various sheens including matte, satin, semi-gloss, and high-gloss, each offering different visual and protective properties.
Consider these key factors when choosing your wood finish:
- Durability: Assess the expected wear and environmental exposure
- Aesthetic Goals: Determine whether you want to highlight or conceal wood grain
- Maintenance Requirements: Some finishes need more frequent reapplication
- Application Method: Consider your comfort level with brushing, spraying, or wiping
Professional woodworkers recommend purchasing small quantities of potential finishes and testing them on scrap wood from your project. This allows you to evaluate color, absorption, and final appearance before committing to a full application.
By thoughtfully matching your finish to the specific requirements of your wood project, you can achieve both stunning visual results and long-lasting protection that preserves your wooden surfaces for years to come.
Step-by-Step Wood Finishing Guide for Beginners
Wood finishing can seem intimidating for beginners, but with the right approach and techniques, anyone can achieve professional-looking results. The U.S. Forest Service’s Wood Handbook emphasizes that successful wood finishing requires patience, preparation, and a systematic approach.
Essential Equipment and Safety Preparation
Before starting your wood finishing project, gather the necessary tools and protective gear. According to Old Masters Guide to Wood Finishing, you’ll need:
- Protective Equipment: Safety glasses, disposable gloves, and a respirator mask
- Sanding Tools: Sandpaper (multiple grits from 80 to 220), sanding block, and tack cloths
- Application Tools: High-quality brushes, foam applicators, lint-free rags
- Finishing Materials: Selected wood finish, mineral spirits, clean work surface
Set up your workspace in a well-ventilated area with consistent temperature and minimal dust. Cover your work surface with a drop cloth and ensure you have good lighting to see your progress clearly.
Preparation and Surface Treatment
Instructables’ wood finishing guide recommends a meticulous preparation process that determines the final finish quality. Begin by thoroughly inspecting your wood surface for imperfections, cracks, or rough areas.
Sanding is crucial for creating a smooth surface that accepts finish evenly. Start with coarse-grit sandpaper (80-grit) to remove major imperfections, then progressively move to finer grits (120 and 220). Always sand in the direction of the wood grain to prevent scratches.
After sanding, remove all dust using a tack cloth or compressed air. For best results, wipe the surface with mineral spirits to eliminate any remaining oils or debris. This step ensures optimal finish adhesion and a professional-looking result.
Finish Application Techniques
Choose your finish based on the project’s requirements and desired aesthetic. Apply the first coat using smooth, consistent strokes in the direction of the wood grain. Use a high-quality brush or foam applicator to prevent streaks and bubbles.
Allow each coat to dry completely according to the manufacturer’s instructions. Lightly sand between coats with fine-grit sandpaper (320-400 grit) to create a smooth surface and promote better adhesion. Wipe away sanding dust thoroughly before applying the next layer.
Most professional-grade finishes require 2-3 coats for optimal protection and appearance. Pay attention to the recommended drying times and environmental conditions. Work in a space with temperatures between 65-75 degrees Fahrenheit and moderate humidity.
Tips for Beginner Success:
- Practice on Scrap Wood: Test your technique and finish on similar wood before working on your main project
- Thin Coats are Better: Multiple thin coats provide better coverage than one thick coat
- Patience is Key: Allow sufficient drying time between coats
- Clean Tools Immediately: Prevent finish buildup by cleaning tools right after use
By following these systematic steps and maintaining a patient, methodical approach, beginners can transform raw wood into beautifully finished pieces that showcase both the wood’s natural beauty and their newfound finishing skills.
To provide clarity for beginners starting a wood finishing project, the following step-by-step process table outlines the essential phases, key actions, and important tips as described in the article:
| Step | Key Actions | Tips for Success |
|---|---|---|
| 1. Gather Equipment & Safety | Collect safety gear, sandpaper, brushes, finish, set up workspace | Ensure good lighting & ventilation |
| 2. Inspect & Sand Wood | Check surface, sand with 80 to 220-grit in grain direction | Use progressively finer grits |
| 3. Clean Surface | Remove dust with tack cloth/mineral spirits | Eliminate all residue for best adhesion |
| 4. Apply First Coat | Use quality brush/foam applicator, go with grain | Thin coats prevent runs and bubbles |
| 5. Dry & Sand Between Coats | Let coat dry, lightly sand with fine grit | Wipe off sanding dust completely |
| 6. Apply Additional Coats | Repeat application and sanding as needed | 2-3 coats recommended |
| 7. Final Cure & Clean Up | Allow finish to cure fully, clean tools immediately | Practice on scrap wood first |
Maintenance and Touch-Up Tips for Lasting Results
Maintaining wood finishes is essential for preserving the beauty and longevity of your wooden surfaces. The U.S. Forest Service’s Wood Handbook highlights that proactive maintenance can significantly extend the life of wood finishes, protecting your investment and keeping surfaces looking pristine.
Regular Cleaning and Care Strategies
Proper cleaning is the foundation of wood finish maintenance. The General Services Administration recommends developing a consistent cleaning routine that protects the finish without causing damage.
For daily maintenance, use a soft, lint-free microfiber cloth to remove dust and light debris. Avoid harsh chemical cleaners that can strip or damage the wood finish. Instead, create a gentle cleaning solution using mild soap and warm water. Always wring out cleaning cloths thoroughly to prevent excess moisture from penetrating the wood surface.
Specific cleaning approaches depend on the type of finish:
- Oil Finishes: Wipe with a slightly damp cloth and dry immediately
- Polyurethane Finishes: Use a specialized wood cleaner designed for sealed surfaces
- Wax Finishes: Buff gently with a clean, soft cloth to maintain shine
Addressing Wear and Damage
The Crucible’s woodworking guide emphasizes the importance of prompt repairs to prevent minor damage from becoming major issues. Regular inspections can help you catch and address potential problems early.
For minor scratches and surface imperfections:
- Light Scratches: Use fine-grit sandpaper (400-grit) to gently buff out surface marks
- Deep Scratches: Apply a matching wood touch-up marker or carefully applied wood filler
- Water Rings: Create a paste of equal parts baking soda and water, gently rub on the affected area
Periodic maintenance is crucial for protecting your wood surfaces. Depending on the type of finish and usage, plan for:
- Annual inspection of wood surfaces
- Touch-up treatments every 1-2 years
- Complete refinishing every 3-5 years for high-traffic areas
Protecting Against Environmental Damage
Environmental factors can significantly impact wood finishes. Protect your wooden surfaces by:
- Controlling Humidity: Use dehumidifiers or humidifiers to maintain consistent moisture levels
- Avoiding Direct Sunlight: Use curtains or UV-protective films to prevent finish fading
- Temperature Management: Keep wooden items away from direct heat sources like radiators
Additional protective strategies include:
- Coasters and Protective Pads: Use under hot dishes, glasses, and heavy objects
- Felt Pads: Apply to furniture feet to prevent scratching
- Regular Waxing: For certain finishes, periodic waxing provides an extra protective layer
By implementing these maintenance techniques, you can preserve the beauty and integrity of your wood finishes, ensuring they remain stunning and protected for years to come. Remember that each type of finish requires slightly different care, so always consult the specific manufacturer’s recommendations for your particular wood surface.

Frequently Asked Questions
What is the most important step in wood finishing?
Proper surface preparation, including thorough sanding and cleaning, is essential as it significantly affects the final finish quality and durability.
How do I choose the right wood finish for my project?
To choose the right finish, consider the type of wood, its intended use, and the environmental conditions it will be exposed to. Each finish type, such as polyurethane or penetrating oils, has specific advantages based on these factors.
How can I ensure a smooth application of finish?
For a smooth application, use high-quality brushes, apply thin, even coats in the direction of the wood grain, and lightly sand between coats to promote adhesion and smoothness.
What maintenance is recommended for wood finishes?
Regular cleaning with a soft cloth, annual inspections for wear, and prompt touch-ups can prolong the life of wood finishes. Additionally, managing environmental factors like humidity and sunlight can help keep the finish looking pristine.
Transform Your Wood Finishing Dreams Into Custom Reality
You have just learned how expert wood finishing techniques can upgrade any space. But sometimes perfecting those techniques at home feels overwhelming. Maybe you worry about achieving flawless surface preparation or choosing a finish that truly preserves your story in wood. That frustration is common in projects where every detail matters.
At CustomCraft UA, our team of dedicated craftsmen blends precision technology with artistic tradition for results that go beyond a glossy surface. Imagine your next piece featuring professional hand-finishing, custom engraving, or environmentally responsible materials expertly selected for your environment. Ready to skip the uncertainty and experience the artistry of true custom woodwork? Visit our homepage and tell us about your project today. Let’s create a finished piece as unique as you are.


